3. Deploy
A machine learning deployment involves making a machine learning system operational and available for real-world applications. This process generally includes the following steps:
- Provisioning the infrastructure: Setting up the necessary hardware and software to run the model.
- Packaging the model: Preparing the model with all its dependencies for deployment.
- Serving the model: Making the model available for use through an API or a similar interface.
- Integrating with upstream and downstream systems: Ensuring the model interacts correctly with other applications and data sources.
For this competition, Highwind takes care of the infrastructure, allowing you to focus solely on packaging and serving your model. Once your model is operational, you can develop applications, such as a Discord bot, to interface with it.
We've selected popular open-source frameworks to help you master the fundamentals of model packaging and serving. You will need to serialize your chosen machine learning model and containerize both the model and its dependencies in a Docker container. It's also essential to adhere to the provided deployment templates, enabling you to serve your model using KServe.
Why Deploy on Highwind
Deploying machine learning solutions can vary significantly in method, making fair and uniform evaluation a challenge. Highwind levels the playing field by defining consistent boundary conditions for storage and compute resources. This ensures that all Zindi participants, regardless of their background or access to resources, can compete on equal footing.
Highwind provides Zindi participants with a robust platform for deploying their solutions, which is crucial for effective testing and iterative improvement. Utilizing Highwind allows participants to confirm successful deployment, iteratively refine their models, and optimize performance to meet competition standards. This structured environment is designed to foster both fairness and excellence, ensuring that every solution is judged accurately and equitably.
How to Deploy on Highwind
Deploying machine learning models on Highwind is a streamlined, three-step process that ensures your models are not just conceptual but fully operational. This essential phase in the competition allows you to test and refine your solutions effectively.
1: Create Asset: Docker Repo
After training your model, you'll have various artifacts, including model binaries and checkpoints.
For this competition, you need to consolidate all these elements into a Dockerfile and then register this as an Asset on Highwind. This process involves two main actions:
1.1 Create an Asset
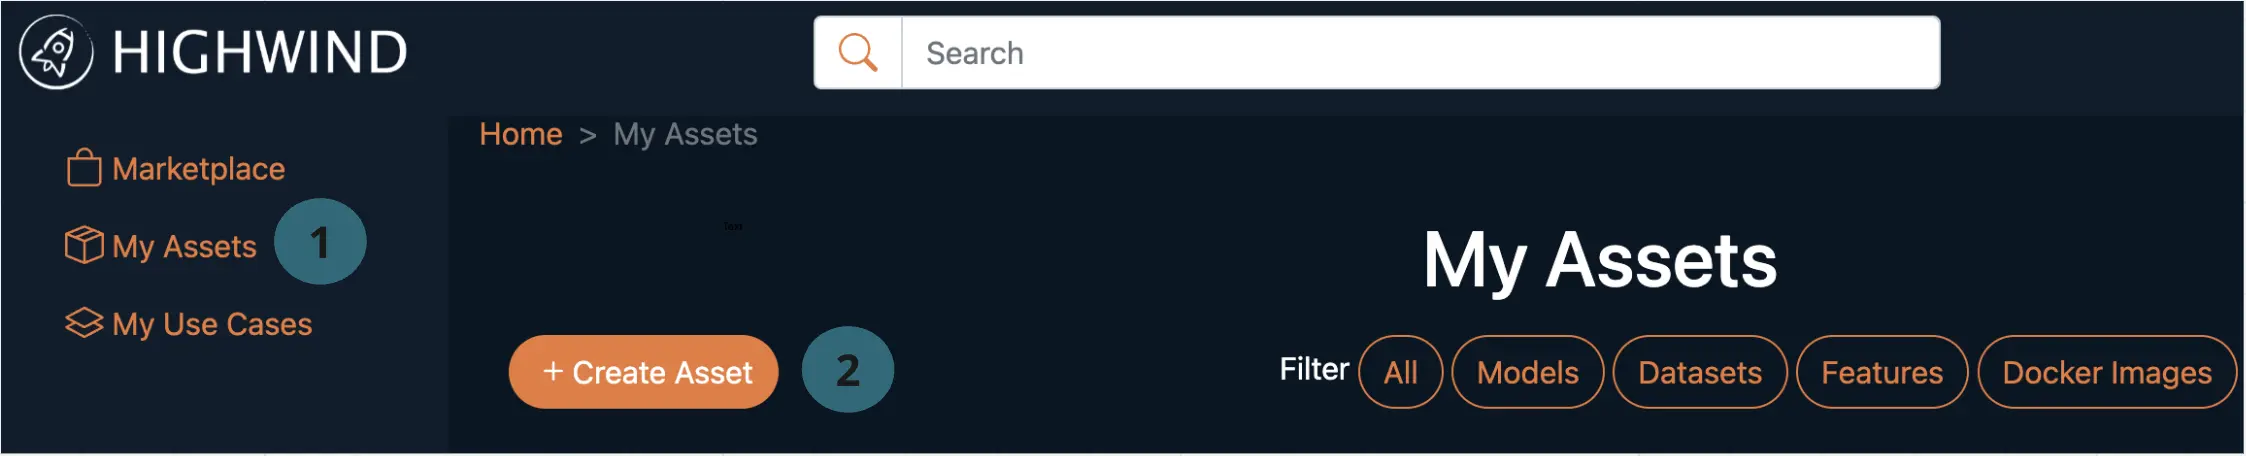
To create an Asset on the Highwind platform:- Step 1: Navigate to My Assets on the left side of the homepage.
- Step 2: Click on + Create Asset.
- This will open a pop-up to create an Asset as shown in the snippet below
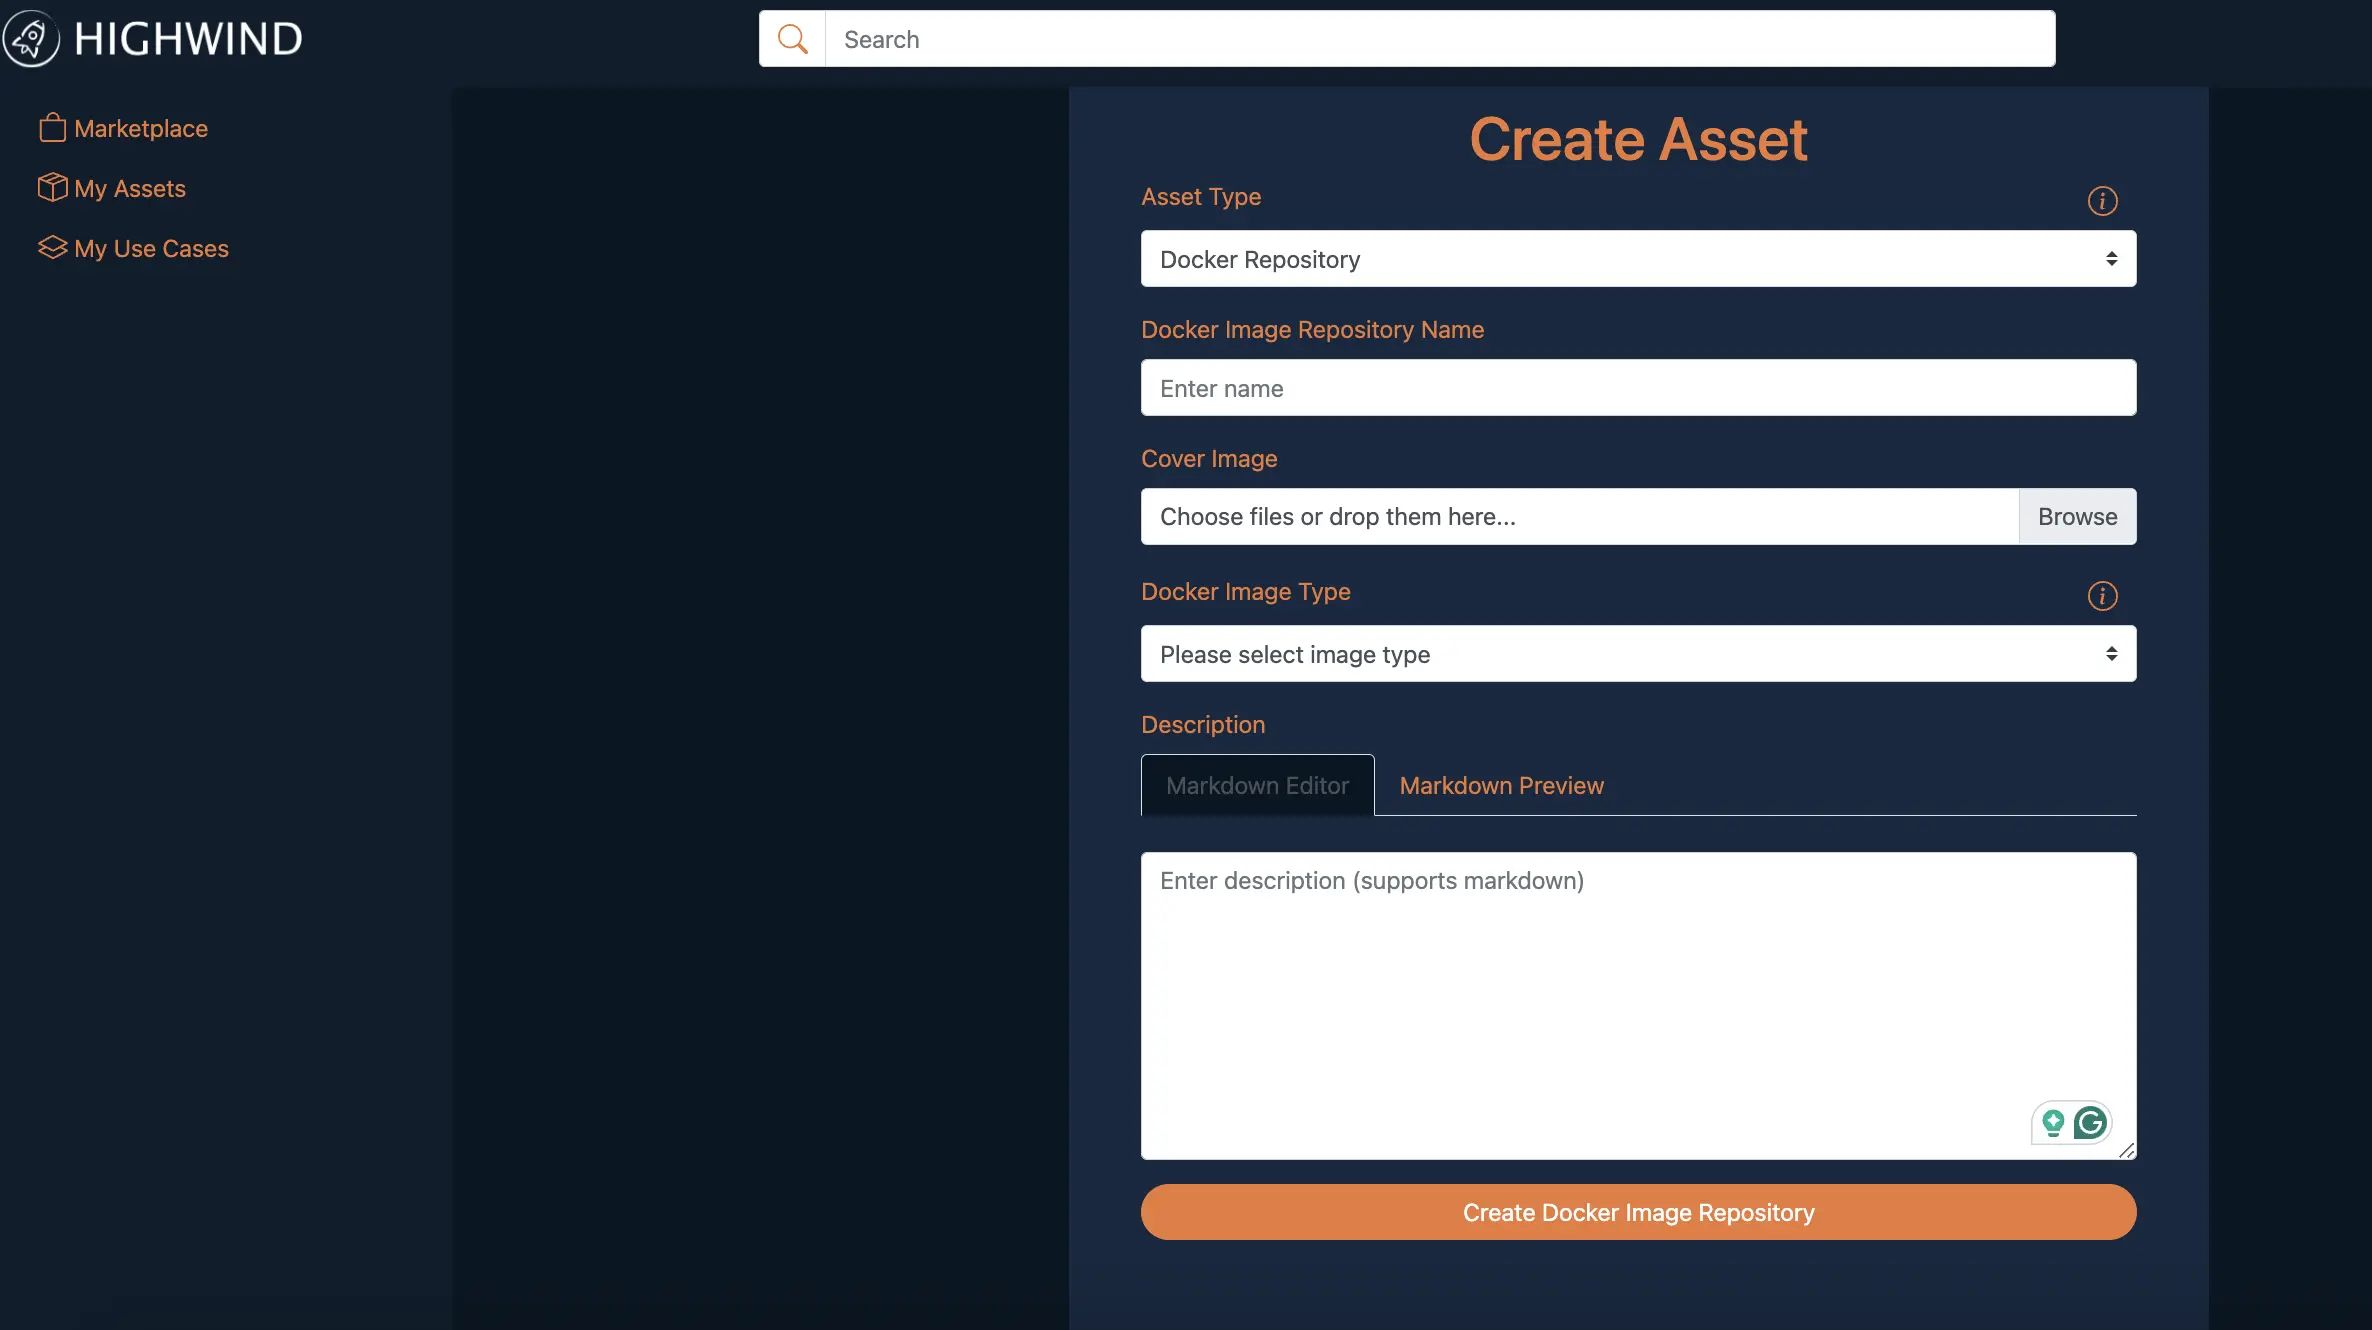
- Step 3: Select Docker repo from the dropdown menu.
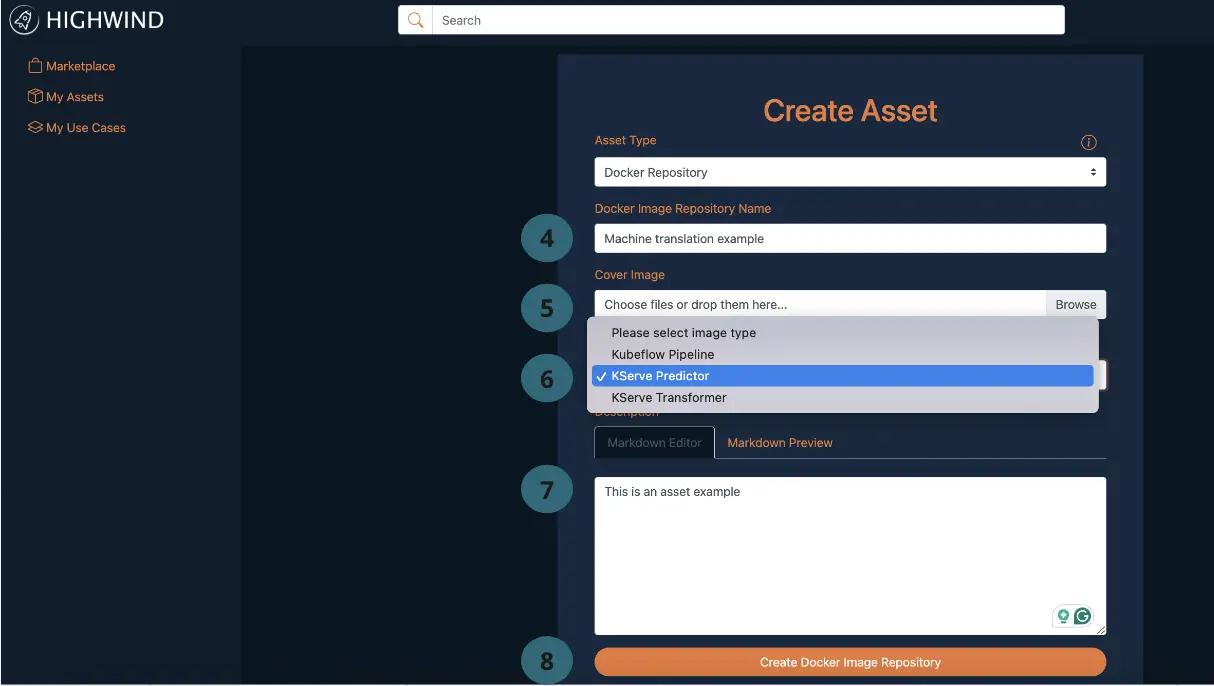
- Step 4: Provide an appropriate Name for your asset.
- Step 5: Upload a cover photo to represent your asset visually.
- Step 6: Choose KServe predictor as the Docker Image Type from the dropdown menu.
- Step 7: Provide an appropriate Description for your asset.
- Step 8: Click on the buttonCreate Docker Image Repository to complete creating an Asset.
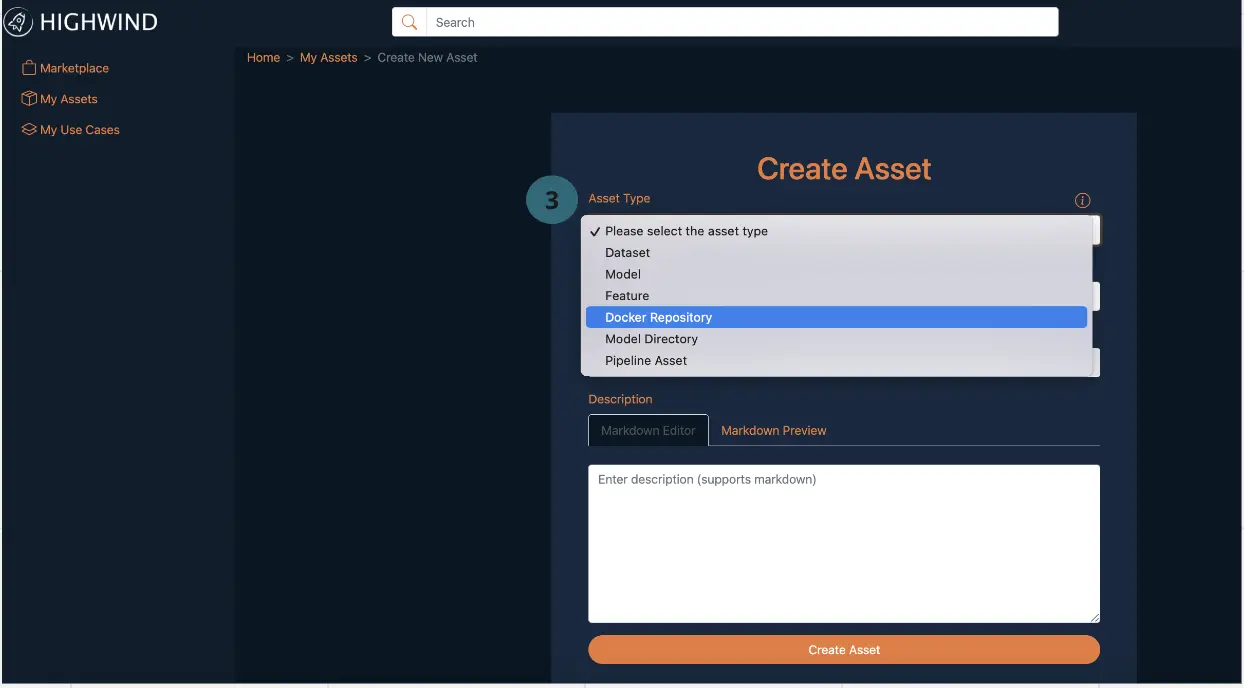
Asset Type: Docker repo
For this competition on Highwind, only the Docker repo Asset type is supported. This restriction ensures that all participants are familiar with the fundamental concepts of Docker, even though other Asset types are available on the platform.Docker Image Type: KServe predictor
For this competition on Highwind, we support only the KServe predictor for Docker Image Type. Highwind offers multiple image types, but we have limited the choices to this type to simplify the experience and ensure a smooth process for all participants.Tips
It is recommended to complete local deployment test before the next step.
1.2 Push your Docker image
After creating the Docker repo Asset, a pop-up will display the Docker Image Push Commands. Follow these steps to push your Docker image:- Retrieve the authentication token.
- Build the Docker image.
- Tag the Docker image.
- Push the Docker image to the repository. Finally, you can navigate to
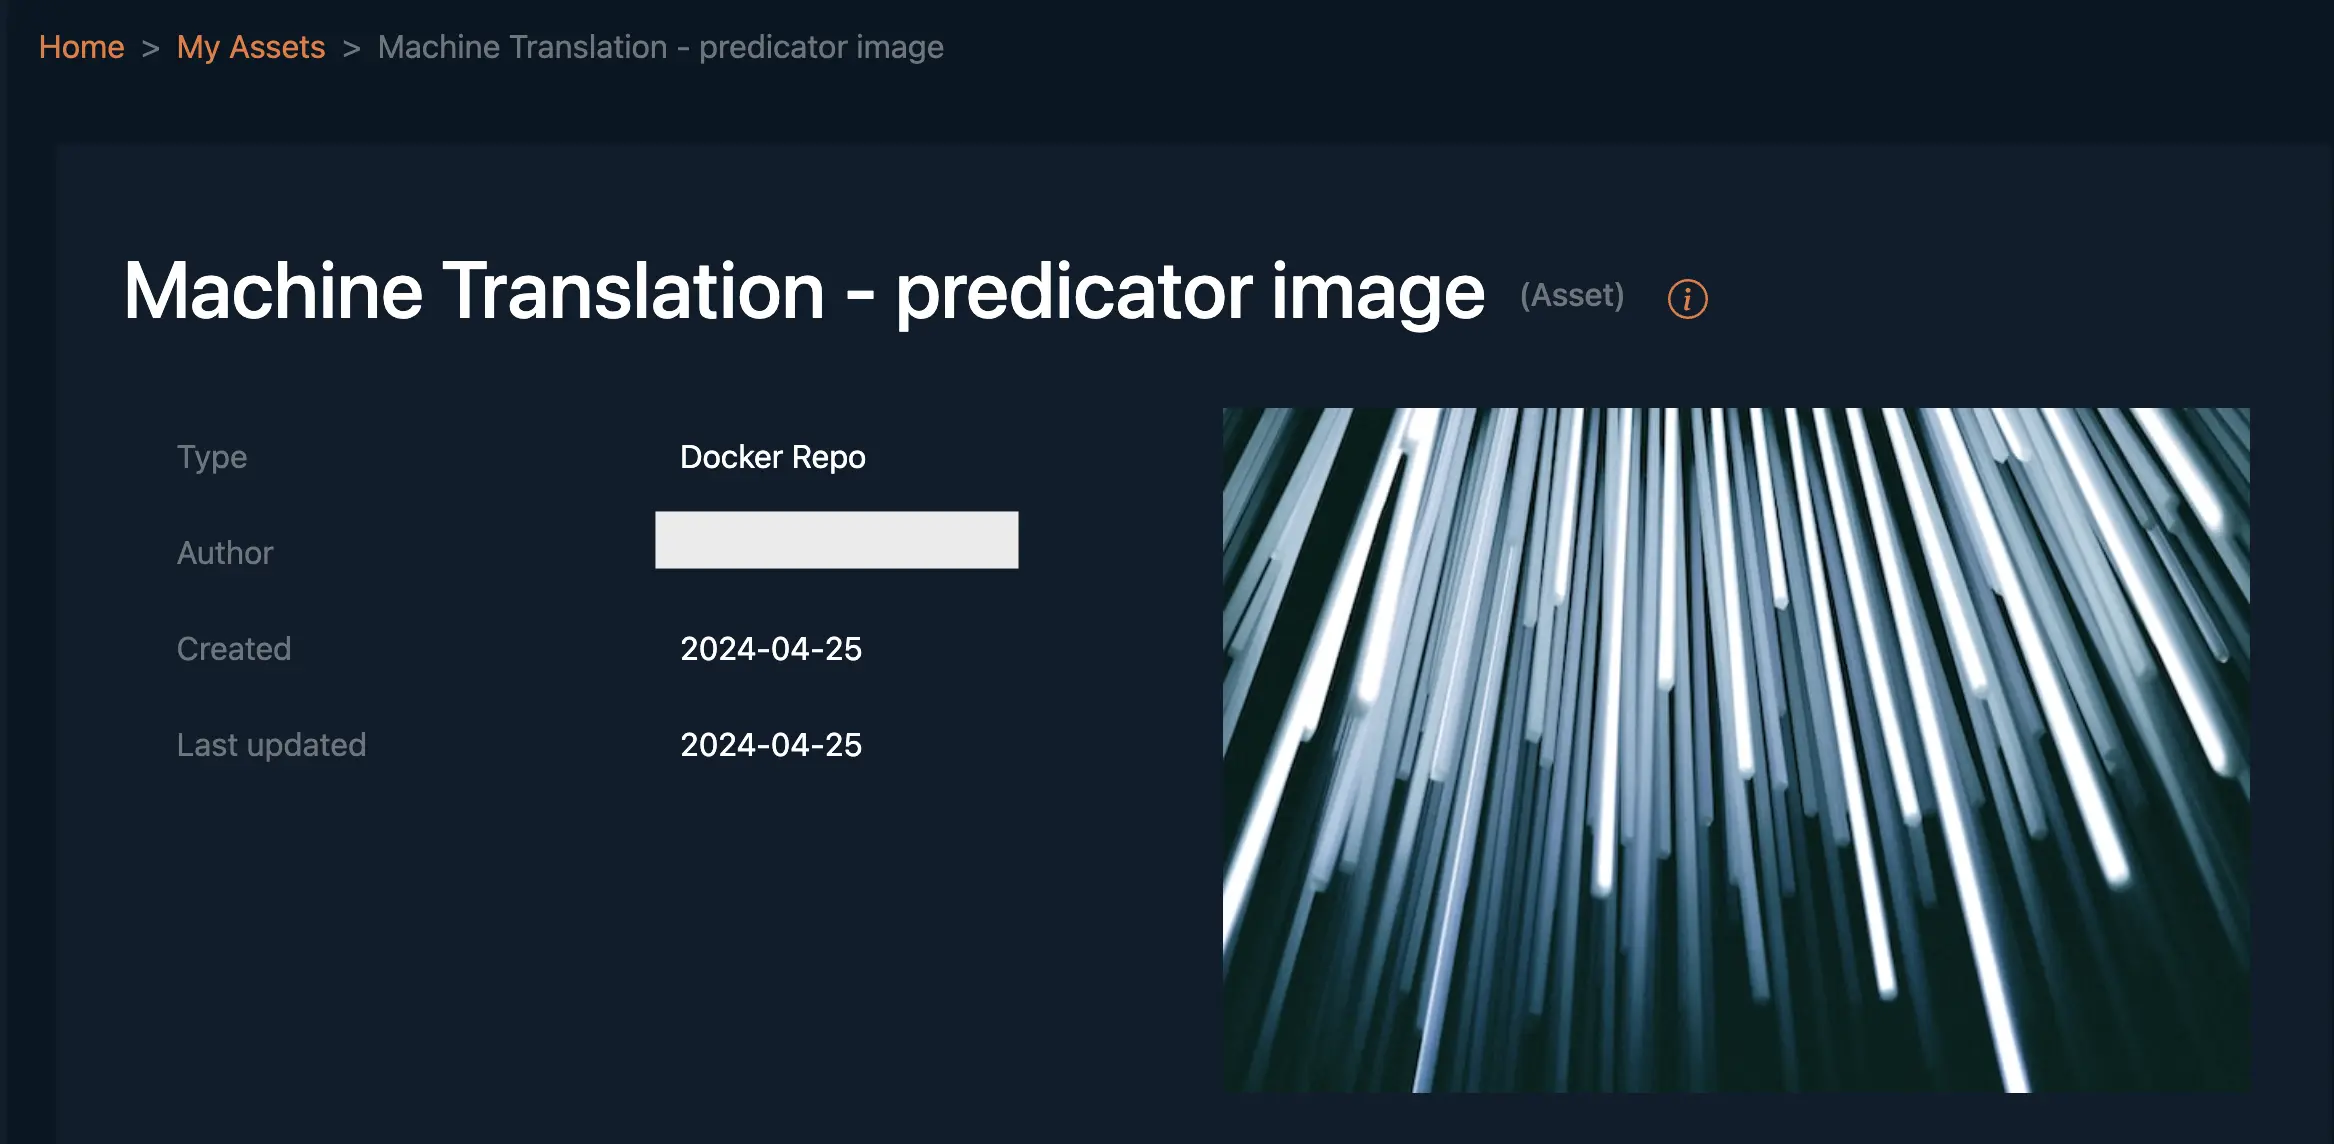
My Assets on the left pane and select View on the Asset you've created. This will refelct the the type of the Asset, in this example it is Docker Repo as shown below.
2: Create Use Case
With your assets uploaded, the next step is to create a Use Case. This acts as a project container where you can assemble and manage your assets such as datasets and Docker Repos. Linking your assets correctly is crucial for the deployment to work seamlessly.
For this competition, your use case will contain two assets:
- Dataset: The competition data purchased through the Higwhind Marketplace
- Docker Repo: Created in Step 1 above
To create a use case follows three key steps:
2.1 Create a Use Case
To create a Use Case on the Highwind platform:- Sign in to Highwind.
- Step 1: Navigate to My Use Cases on the left side of the screen.
- Step 2: Click on + Create Use Case.
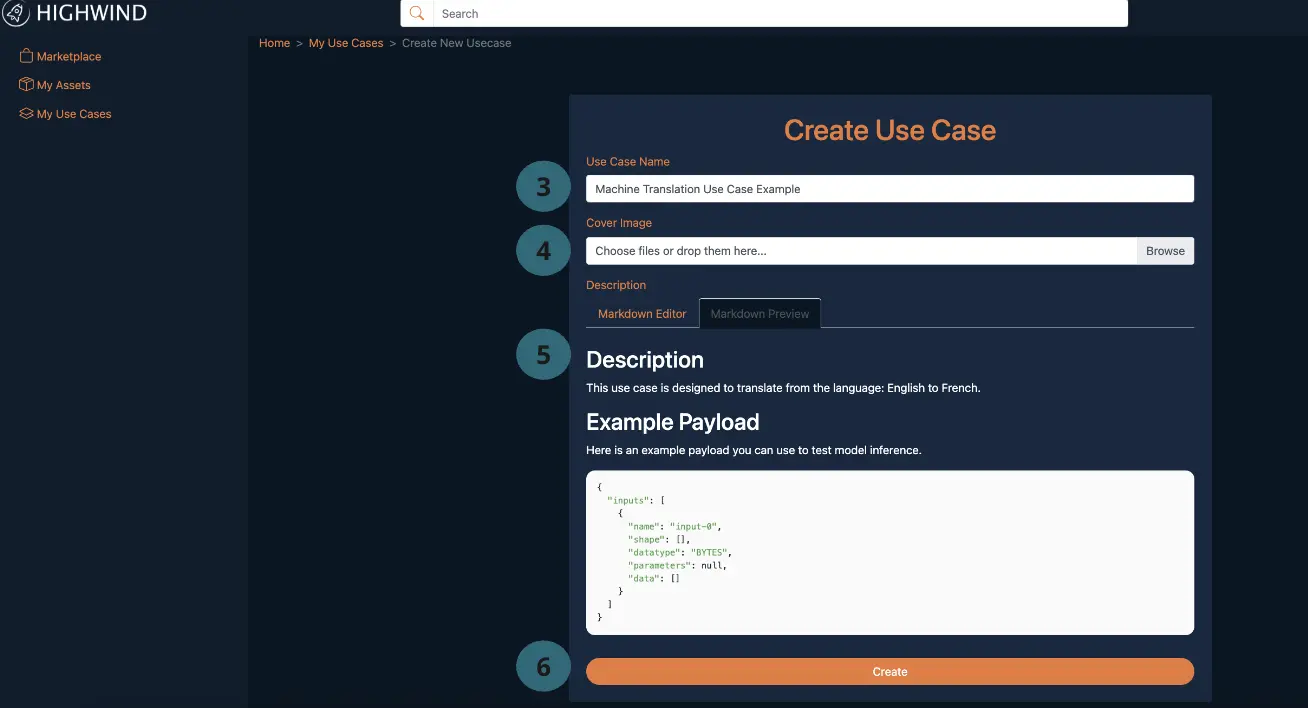
- This will open a pop-up to create a Use as shown in the snippet below
- Step 3: Provide an appropriate Name.
- Step 4: Upload a cover photo to represent your use case visually.
- Step 5: Provide an appropriate Description.
- Step 6: Click the Create button to finalize the creation.


2.2 Link the Asset
- Step 1: After creating the Use Case, locate it under My Use Cases.
- Step 2: Click on the
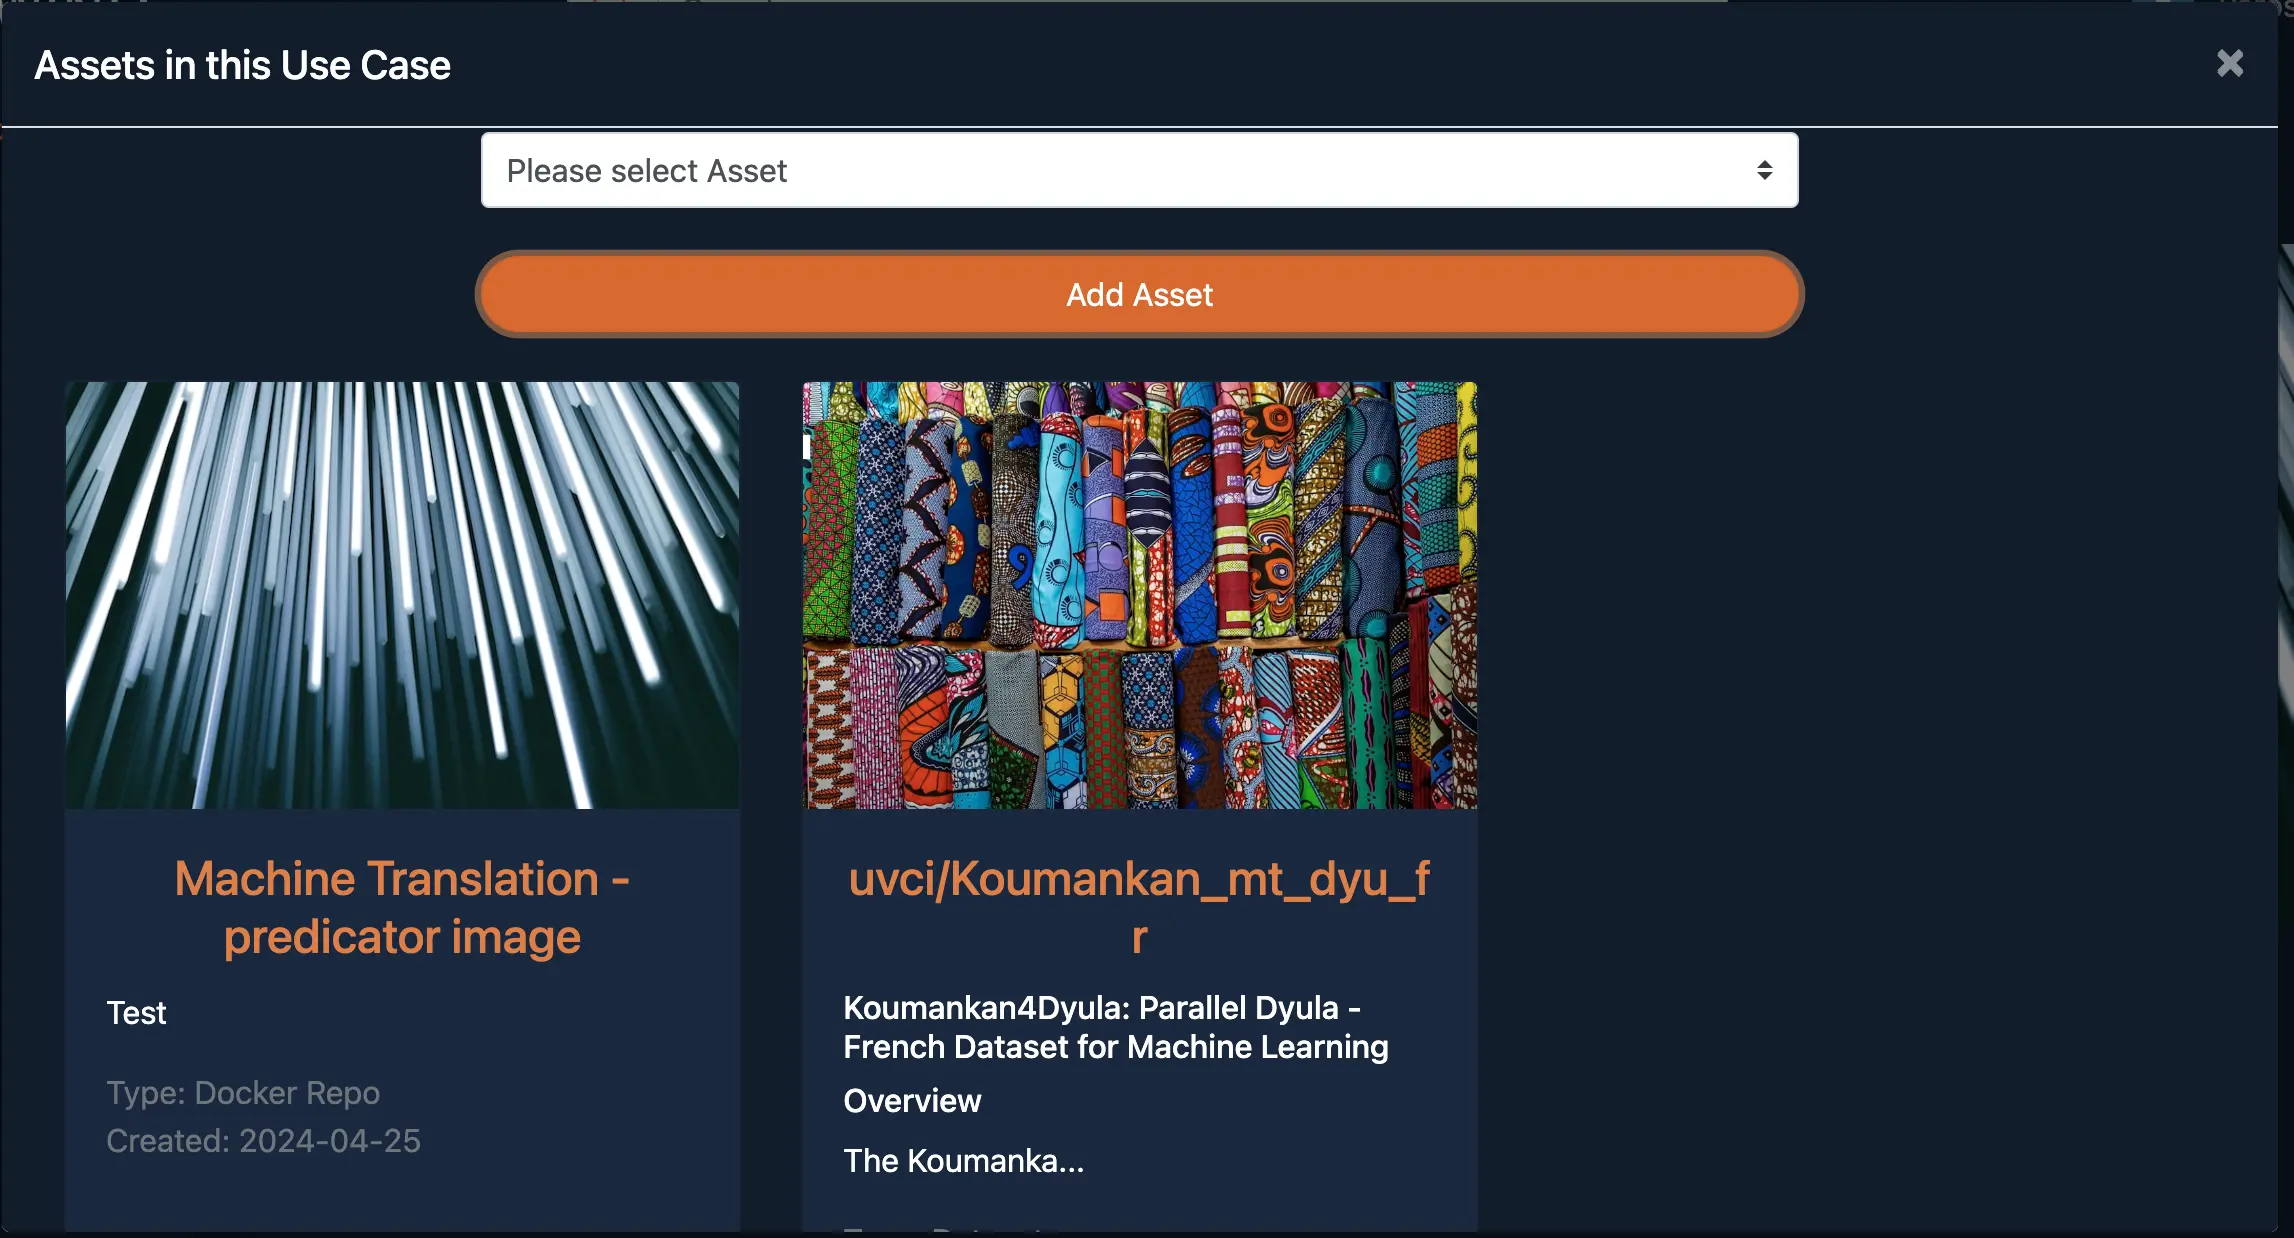
Viewbutton to view the appropriate Use Case. - On the Use Case card, you will see a message:
There are no Assets in this Use Case yet. - Step 3: Click the Add Asset button to begin linking an asset.
- Step 4: Select the Asset you previously created and click Add Asset to link it as shown in the snippet below.
- Step 5: Click Add Asset to link it as shown in the snippet below.
- The Assets section on the
Use Casecard should now display the name of the linked Assets.


2.3 Link the Dataset Asset
You should have purchased the competition dataset already in the Experiment step. You can repeat the steps described in Step 2.2 to link the Dataset Asset to your Use Case. Once both the Dataset Asset and the Docker Repo Asset are linked, you can click on
View Assets button, which will show you the linked Assets to this Use Case.
3: Deploy Use Case
3.1 Deploy the Use Case
Once your Use Case is set up with all necessary assets linked, you are ready to deploy. Deploying your Use Case activates it for real-world testing and validation. Make sure everything is configured correctly before proceeding.
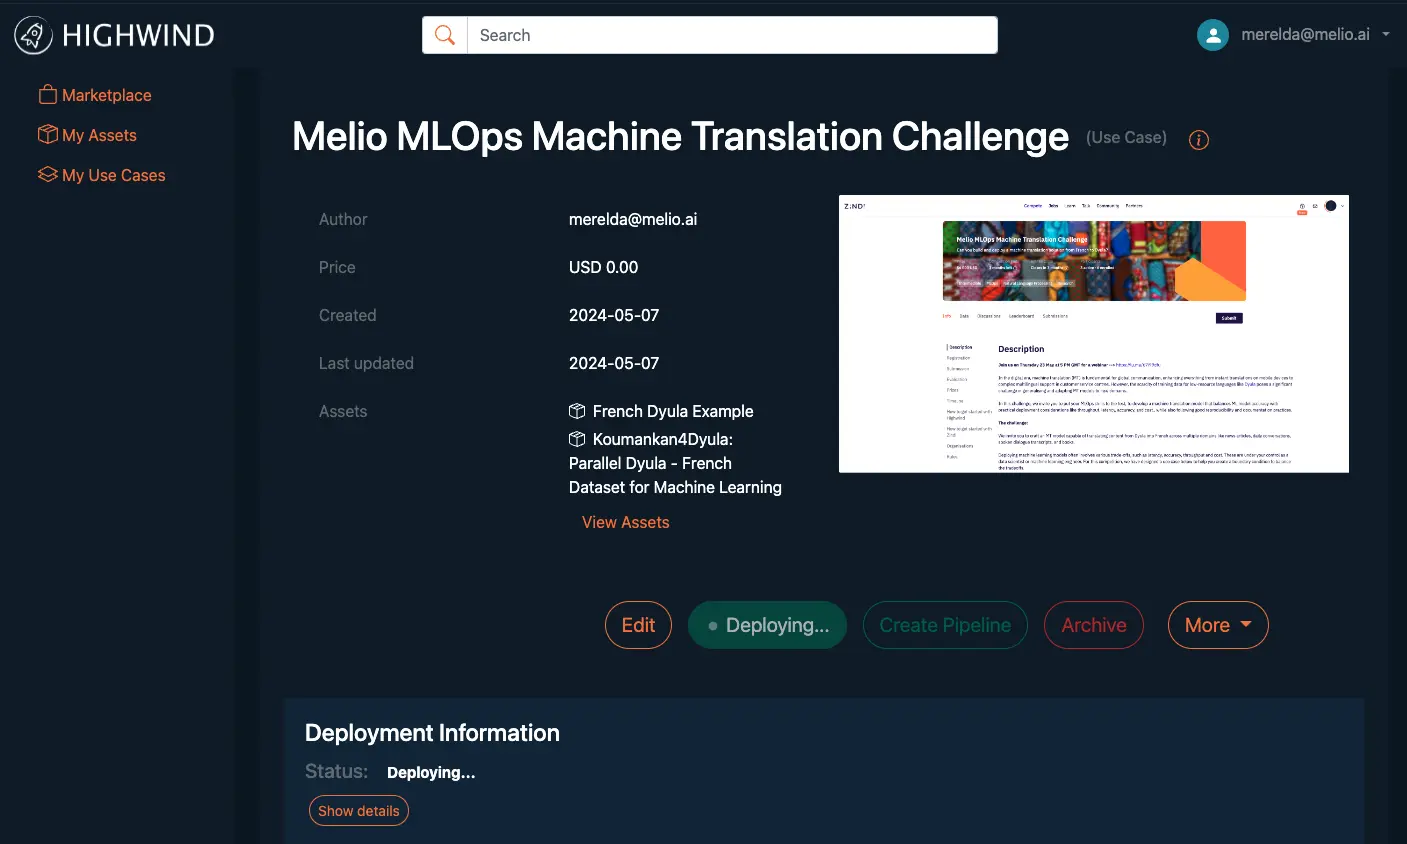
- Locate the Use Case card and find the green button labeled
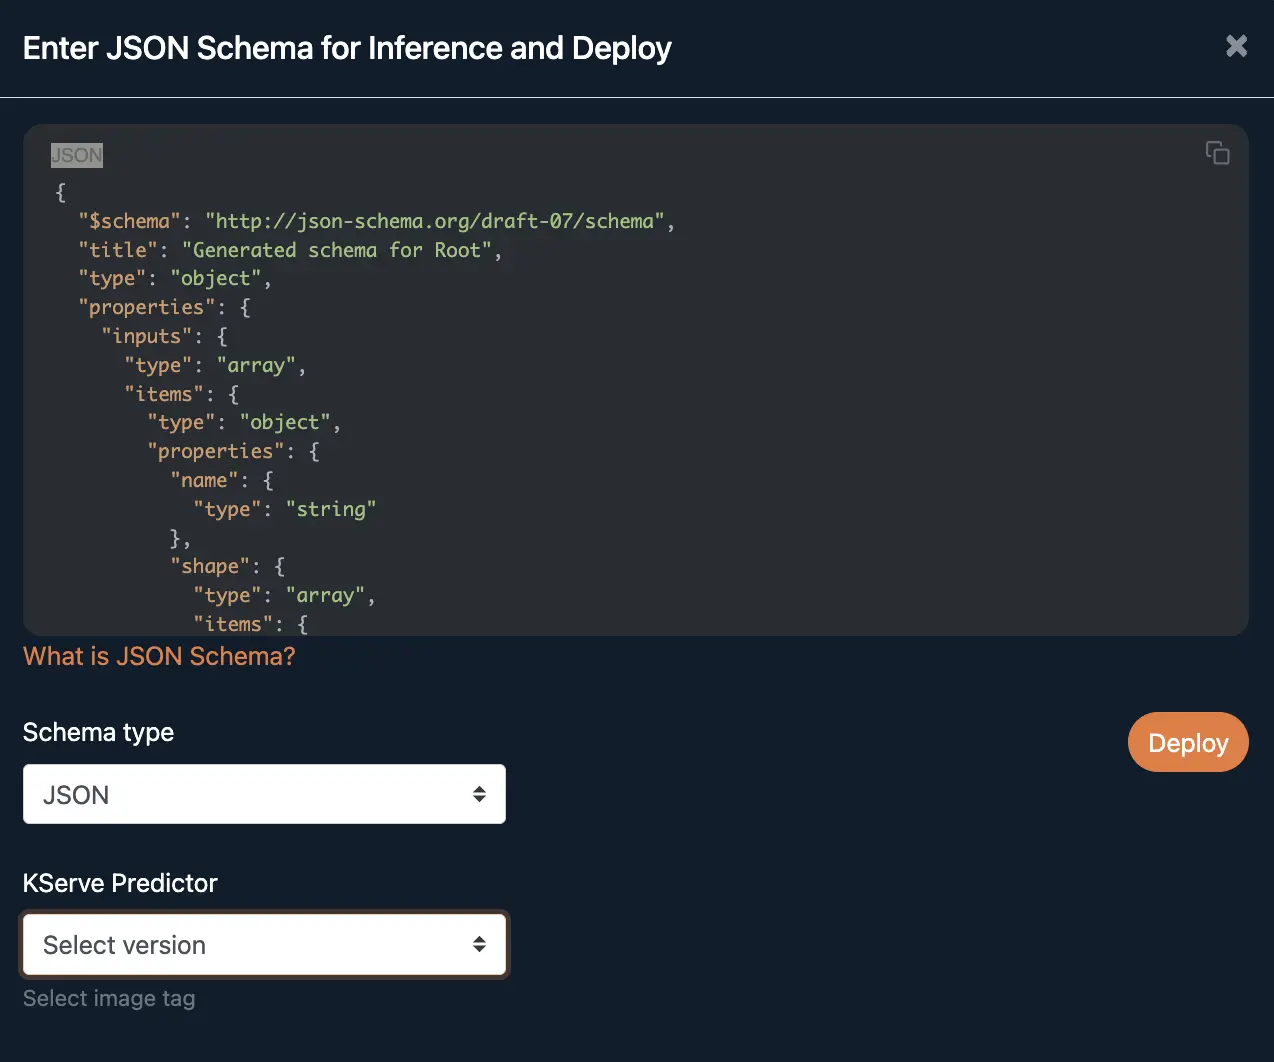
Deploy. - Click the
Deploybutton, which will open a screen withJSON schemaforinference and deploymentas shown in the snippet below. - Make sure to update the JSON schema to conform to the payload your model expects. For the competition, your data is
stringand your datatype isBYTE - Click on
Deployto initiate the deployment process. - The
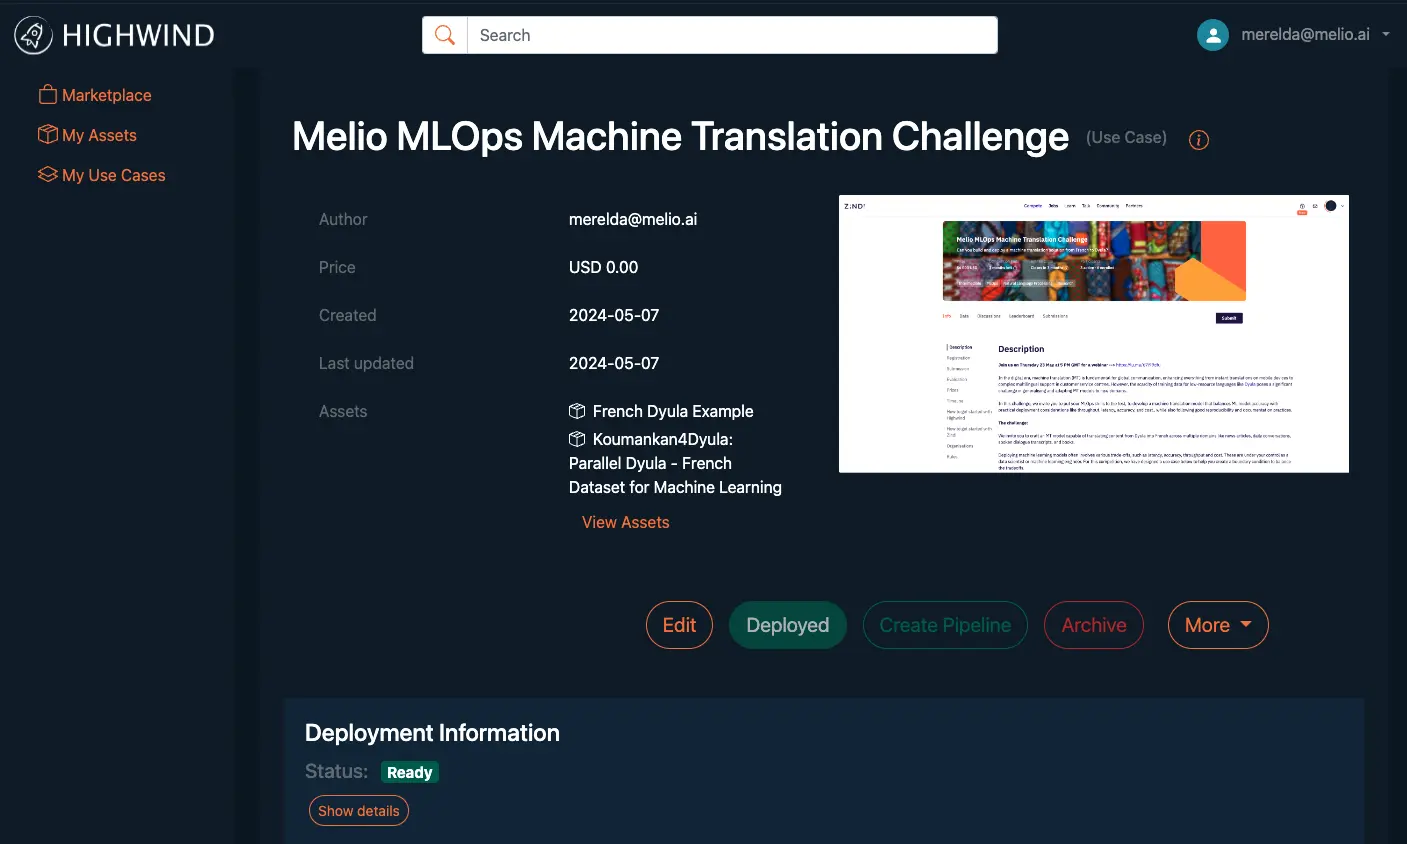
Deployment statuswill update to display the progress of the deployment. - Upon successful deployment, the deployment status will reflect
Ready.
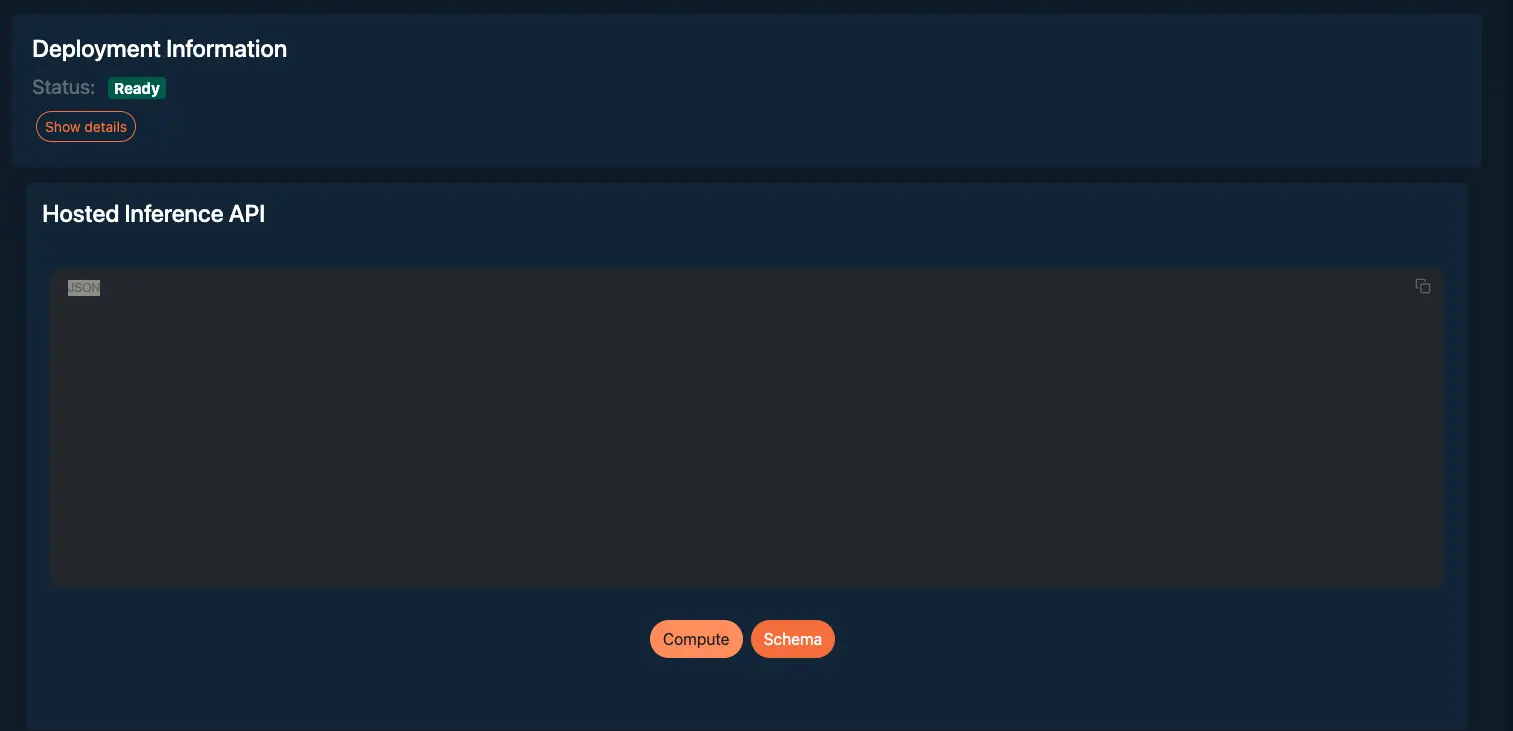
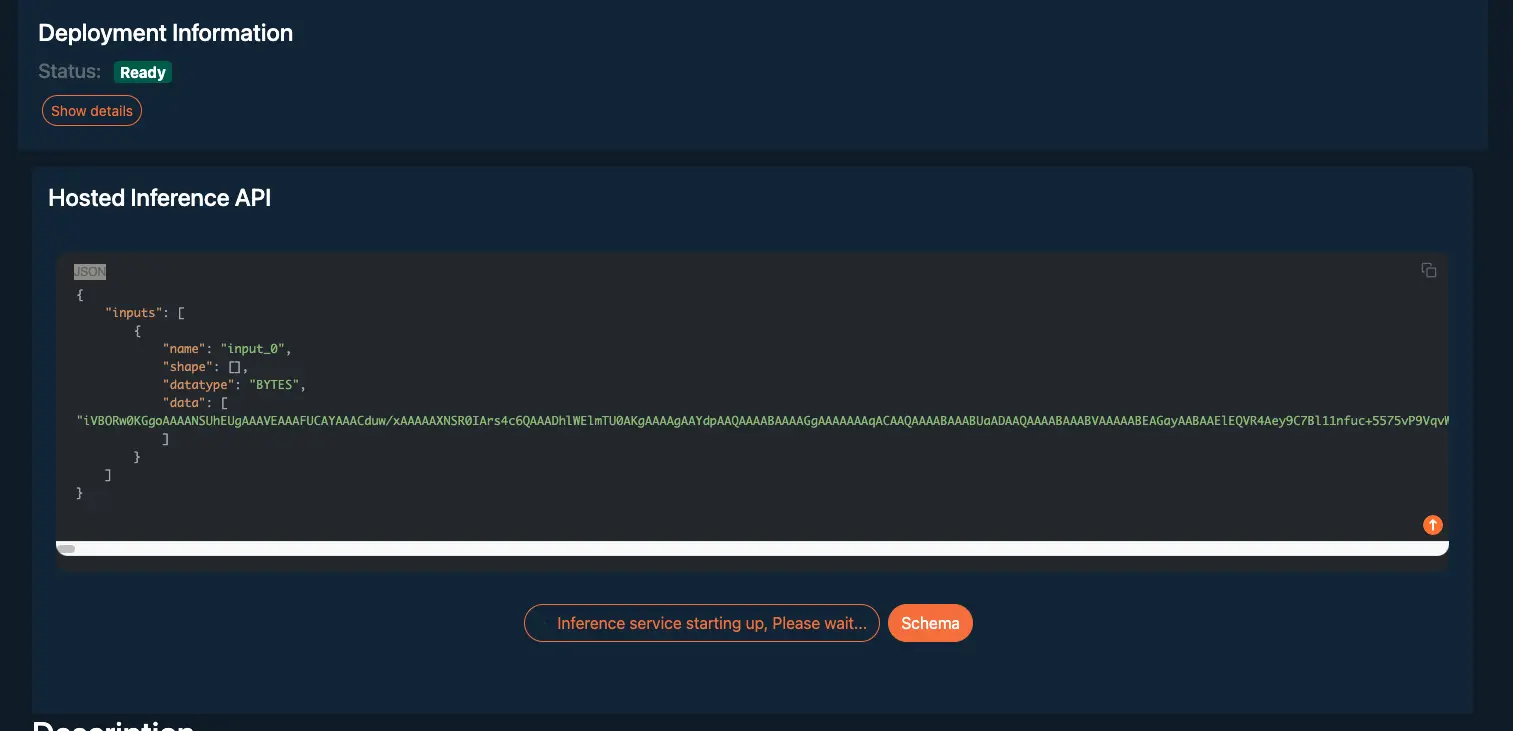
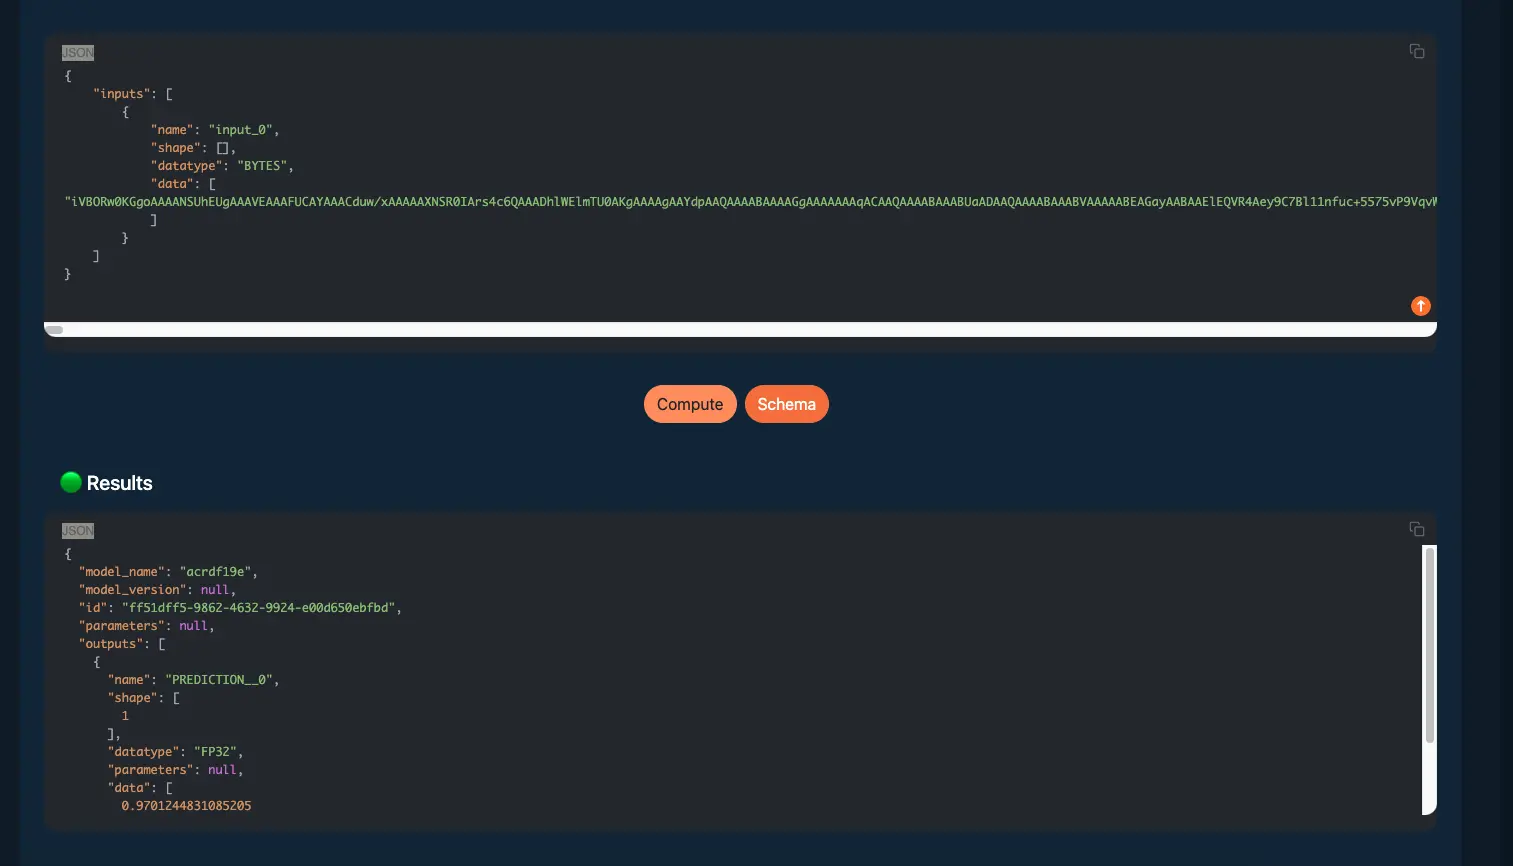
3.2 Test the Deployed Use Case
Once your Use Case has been sucessfully deployed, you can proceed to test as per the following:
- Below the
Deployment Information, you will see a section calledHosted Inference API - Within the
Hosted Inference APIsection, add input test injsonformat and click on thecomputebutton. - Once done, you will see a section called
Resultswith the test results.
Zindi Rules
Hardware Limitations
Participants in this competition must adhere to the following hardware restrictions:
- CPU: Less than 1 CPU
- Memory: Less than 2GB RAM
- Docker Image Size: Less than 8 GB
These limitations may be adjusted based on participant submissions. If your project requires more resources, please contact the competition team for support.
Submission Limitations
Please note that there is a limit of 3 submissions per day. This policy is designed to prevent submission spamming and to ensure fair and optimal resource allocation for all participants. Note that there are no limits on deploying your model on Highwind.